Over the past few weeks, I took on a technical challenge: Automate the same Universal Material Testing Machine using two completely different platforms.
Once with TACTUN, our no-code control platform.
And once with LabVIEW + CompactRIO from National Instruments.
The machine stayed the same. The control goals were identical. Only the platform changed.
I didn’t set out to crown a winner — just to see how the process unfolds from an engineer’s seat, and where each approach shines (or struggles) when applied to real-world machine automation.
The machine used a DC motor with an encoder for position feedback, a strain-gauge load cell for force measurement, digital inputs for E-Stop and limit switches. Pretty standard setup.
On the hardware side:
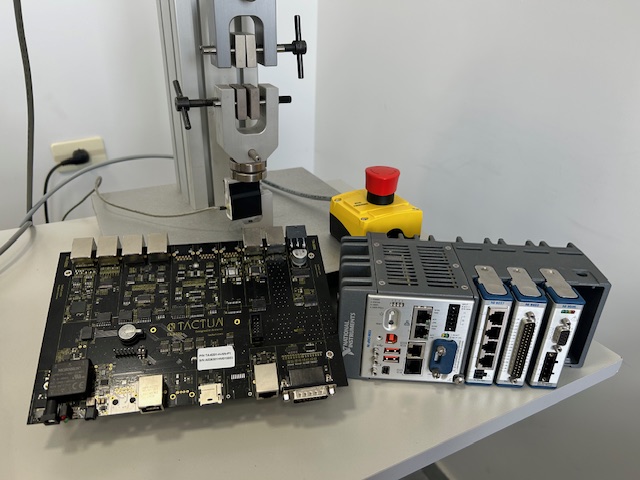
With TACTUN, I opened the platform, defined sensor and actuator types, assigned them to controller channels, and got instant live data. It was a 20-minute visual configuration sprint — like snapping together LEGO blocks.
LabVIEW, as expected, was more involved.
I started by creating a new project, assigning C-Series modules, mapping out FPGA resources, and initializing communication loops. Some components — like PWM and encoder reading — were borrowed from earlier projects we’d done in the past. They weren’t copy-paste ready, but they saved hours of low-level work.
It still took me about half a day to get everything booting, compiling, and talking.
Calibration is one of those things you want to do once and never touch again.
In TACTUN, it was exactly that. I used the built-in piecewise calibration tool for the load cell and a simple linear conversion for the encoder. Then, directly from the dashboard, I selected the Control Stage widget, configured the PID settings, and ran the motor — no coding involved.
On the LabVIEW side, I used the built-in PID VI from the FPGA library, so I didn’t have to implement the control loop from scratch. However, setting it up still required configuring inputs, exposing tuning parameters, and wiring up the logic. Calibration functionality was added in the RT layer, and at this point, I tested everything using the RT front panel — no host application yet. While I reused logic from previous projects, adapting it to this setup still took a few focused hours.
I wanted both platforms to stream live data — force and position — to a graph on the host PC.
In TACTUN, this was straightforward: I added a couple of graph widgets to the dashboard, selected the signals, and set the sampling rate. Done in under 3 minutes.
LabVIEW was a different beast. I implemented FPGA → RT communication using DMA FIFOs, then wrote a DMA data handler in the RT layer, as well as queue to transfer the data stream from DMA data handling loop to host communication loop. From there, I used Network Streams to send structured packets to the host PC. Error handling, reconnection logic, queued data transfer — it became a small project of its own. This step alone stretched into multiple days.
For the final milestone, I needed a function generator to control the actuator: sine, ramp, square wave — each with customizable parameters like amplitude, frequency, and cycle count.
In TACTUN, this was a single widget: Control Stage. I added it to the dashboard, chose “Sine,” entered amplitude, mean, frequency and cycles, and hit “Run.” The motor responded immediately with a smooth, controlled profile. I adjusted PID gains on-the-fly.
In LabVIEW, I wrote the waveform generator in FPGA. Then I created a config panel in the Host app, added transfer protocols to send the waveform to RT, and from RT to FPGA. Testing each waveform took time. Debugging took more.
The full stack — UI → RT → FPGA — ended up taking more than a week.
Here’s a rough summary of how much time each part of the process took — broken down by development type:
|
Task
|
TACTUN
|
LabVIEW + cRIO
|
|---|---|---|
|
Sensor & I/O Setup
|
~20 min (visual config)
|
~4 hrs (FPGA + RT setup + debug)
|
|
Sensor Calibration
|
~1.5 min
|
~3.5 hrs (RT coding + test)
|
|
PID Control
|
Built-in
|
~1.5 hrs (FPGA implementation + RT configuration)
|
|
Data Streaming
|
~2.5 min
|
~1.3 week (DMA + Network Streams + UI)
|
|
Motion Profile Generator
|
~1.5 min (widget config)
|
~1.1 weeks (FPGA + RT + UI + comms + test)
|
|
Total Active Development Time
|
~30 min
|
~2.5+ weeks (with prior code reuse)
|
On average, development tasks took over 230X longer to implement in LabVIEW compared to TACTUN.
Understanding how long it takes to become productive with each platform is equally important.
With TACTUN, you can get started in a day:
No coding needed — everything is configured visually
Guided workflows for I/O setup, calibration, control, and UI
If you’re familiar with sensors and actuators, you’ll feel at home quickly
With LabVIEW + CompactRIO, the ramp-up is significantly longer:
NI’s recommended Core 1 & 2 training takes 5 full days, just to cover the basics
Working with Real-Time and FPGA requires:
Understanding LabVIEW’s dataflow model
Learning multitasking, timing control, DMA communication
Debugging across multiple abstraction layers
In reality, it takes several weeks to be productive, and months to become confident — especially with more complex applications
While this experiment focused on a single material testing machine, the patterns I observed hold true across the majority of such systems — whether it’s a simple UTM, a high-speed fatigue tester, or a multi-axis servo-hydraulic rig.
Here’s a breakdown of the platform-specific strengths and tradeoffs from that perspective:
|
Criteria
|
TACTUN
|
LabVIEW + cRIO
|
|---|---|---|
|
Development Time
|
Extremely fast — most tasks completed in hours thanks to built-in logic and visual tools
|
Long — from weeks to months, especially when building features from scratch
|
|
Ease of Use
|
Intuitive for non-programmers; drag-and-drop UI design, guided flows
|
Requires programming expertise (FPGA, RT, Host), steeper learning curve
|
|
Flexibility & Granularity
|
Limited low-level access (by design); optimized for common testing applications
|
Full access to hardware internals; ideal research-grade modifications
|
|
Visualization & UI
|
Built-in dashboard widgets for control, monitoring, and test execution. Custom button widget creation.
|
Requires custom UI development; more flexibility, but more effort.
Almost no scaling (requires significant efforts)
|
From my experience during this project — and based on many conversations with machine builders — each platform clearly aligns with a different type of user and use case.
TACTUN is a great fit for:
Small to mid-sized manufacturers
Applications where speed, repeatability, and a polished end-user experience matter more than deep customization
If your goal is to ship production-ready machines quickly — without building everything from scratch — TACTUN helps you move fast without sacrificing quality or flexibility within standard test workflows.
LabVIEW + CompactRIO, on the other hand, is ideal when:
You’re doing advanced R&D or academic work
You need complete control over every part of the system
You’re working with novel sensors, non-standard hardware, or want to prototype entirely new control schemes
It remains a powerful platform when you’re pushing the boundaries of what a machine can do — and when your team has the time and expertise to build that control stack from the ground up.
This project wasn’t about speed records or pitting platforms against each other. It was about transparency — and curiosity. I wanted to explore what it really feels like to build the same machine behavior using two very different tools.
If you’re a machine builder, or R&D engineer — I hope this comparison helps you choose the right path for your next build.
Share this post:


